


There’s a lot to get done after you move into a new home. You’ve got to unpack (of course), set up your utilities, change your address with the post office, and yes: change your locks.
Changing the locks (also referred to as rekeying the locks) on a new home is always a good idea, since you really can’t be sure who has access to the property otherwise. The phrase for this is key control, which refers to the ability to be able to account for each of the keys to your home and who has them. And it’s as good of a reason as any to learn how to change locks when you move in.
What You’ll Need
Your first step in any home DIY project is to gather all of the necessary supplies. And when it comes to how to change locks, you’ll only need a couple of things, two of which you probably already have in your toolkit.
Here’s what you’ll want to have on hand:
New locks. Purchase a new lock for each door that you intend to rekey. A standard deadbolt kit usually includes each of the lock pieces that you’ll require, including mounting hardware and the interior turner. If you can, try to buy a new lock that’s the same make, model, and manufacturer as the lock that you’re replacing. This will help ensure it’s the right fit.
Measuring tape. Measure before you go the hardware store. Most new deadbolts are adjustable, but you’ll still want to make sure that you’re in the right range. You can find a good overview on how to measure door locks here.
Screwdriver. Look at your existing hardware to determine whether you’ll need a flathead or a Phillips head. Depending on the screws in the new deadbolt kit you’ve purchase, you may need both types of screwdrivers (or you can just use a 4-in-1).
How to Change Locks: A Step-by-Step Guide
Now that you’ve got the right supplies, it’s time to get to work.
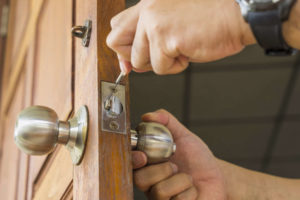
Step one: Remove the old deadbolt lock and hardware. This part is pretty easy. Locate the screws on the interior side of the lock (the side with the turner) and remove them, along with the turn plate. You should now have a hole that you can see through. Open your door so you can see the side of the lock (the narrow part running along the inside of the door) and locate and remove those screws as well. Remove the rest of the deadbolt hardware from the door.
Step two: Insert your new deadbolt. Take your new deadbolt hardware and install it where the old one was. Most deadbolts will say “up” on one side to help you designate where to position it. Use the provided mounting hardware in your deadbolt assembly kit to secure the hardware in place.
Step three: Insert your new lock. The deadbolt will have slots where you can fit in both the locking/key part and the turning part of your new lock. Assemble the pieces where they need to go, and secure them in place with the screws provided in your deadbolt assembly kit.
Step four: Test. Always test your new lock after changing it instead of just assuming that it works. To do so, make sure that it locks and unlocks with the key, and that it locks and unlocks with the turner on the interior.
And that’s it! Prioritize your rekeying efforts starting with the front door of your home, since if the previous owner of the home did share keys with other people that’s probably the door they were given access to. From there, change the locks on other exterior facing doors, and change your garage code as well. You can choose to change locks on interior doors as well, but it doesn’t have to be done right away.